在本教程中,我们将向您展示如何在 Ubuntu 20.04 LTS 上安装 LibreNMS。 对于那些不知道的人,LibreNMS 是一个用于服务器和网络硬件的开源自动发现网络监控工具。 它支持广泛的网络硬件,如 Cisco、Juniper、Brocade、Foundry、HP,以及包括 Linux 和 Windows 在内的操作系统。 LibraNMS 是网络监控工具“Observium”的基于社区的分支,在 GPLv3 下发布。
本文假设您至少具备 Linux 的基本知识,知道如何使用 shell,最重要的是,您将网站托管在自己的 VPS 上。 安装非常简单,假设您在 root 帐户下运行,如果不是,您可能需要添加 ‘sudo‘ 到命令以获取 root 权限。 我将向您展示在 Ubuntu 20.04(Focal Fossa)上逐步安装 LibreNMS。 对于 Ubuntu 18.04、16.04 和任何其他基于 Debian 的发行版,如 Linux Mint,您可以按照相同的说明进行操作。
在 Ubuntu 20.04 LTS Focal Fossa 上安装 LibreNMS
步骤 1. 首先,通过运行以下命令确保所有系统包都是最新的 apt 终端中的命令。
sudo apt update sudo apt upgrade
步骤 2. 安装 LEMP 堆栈。
需要 Ubuntu 20.04 LEMP 服务器。 如果您没有安装 LEMP,您可以在此处按照我们的指南进行操作。
步骤 3. 在 Ubuntu 20.04 上安装 LibreNMS。
让我们安装 LibreNMS 所需的软件包:
sudo install apt install curl composer fping git graphviz imagemagick rrdtool snmp snmpd whois unzip python python3-pip
现在我们将从 GitHub 存储库中获取 LibreNMS 源代码:
cd /opt git clone https://github.com/librenms/librenms.git
接下来,创建一个将管理 LibreNMS 的用户并将 Nginx 添加到 LibreNMS 组:
useradd librenms -d /opt/librenms -M -r usermod -a -G librenms www-data
我们将需要更改一些文件夹权限:
chown -R librenms:librenms /opt/librenms chmod 770 /opt/librenms setfacl -d -m g::rwx /opt/librenms/rrd /opt/librenms/logs /opt/librenms/bootstrap/cache/ /opt/librenms/storage/ setfacl -R -m g::rwx /opt/librenms/rrd /opt/librenms/logs /opt/librenms/bootstrap/cache/ /opt/librenms/storage/
之后,我们将获得一个 PHP 脚本,它将安装 composer 依赖项。 要执行它,我们将使用以下命令。 要执行这个脚本,我们需要切换到 LibreNMS 用户:
su - librenms cd /opt/librenms ./scripts/composer_wrapper.php install --no-dev exit
步骤 4. 为 LibreNMS 配置 MariaDB。
默认情况下,MariaDB 未加固。 您可以使用 mysql_secure_installation 脚本。 您应该仔细阅读以下每个步骤,这些步骤将设置 root 密码、删除匿名用户、禁止远程 root 登录、删除测试数据库和访问安全 MariaDB:
mysql_secure_installation
像这样配置它:
- Set root password? [Y/n] y - Remove anonymous users? [Y/n] y - Disallow root login remotely? [Y/n] y - Remove test database and access to it? [Y/n] y - Reload privilege tables now? [Y/n] y
接下来,我们需要登录 MariaDB 控制台并为 LibreNMS 创建一个数据库。 运行以下命令:
mysql -u root -p
这将提示您输入密码,因此输入您的 MariaDB 根密码并点击 Enter. 登录到数据库服务器后,您需要为 LibreNMS 安装创建一个数据库:
MariaDB [(none)]> CREATE DATABASE librenms CHARACTER SET utf8 COLLATE utf8_unicode_ci; MariaDB [(none)]> CREATE USER 'librenms'@'localhost' IDENTIFIED BY 'YOUR-PASSWD'; MariaDB [(none)]> GRANT ALL PRIVILEGES ON librenms.* TO 'librenms'@'localhost'; MariaDB [(none)]> FLUSH PRIVILEGES; MariaDB [(none)]> exit
完成后,打开 MariaDB 配置文件并在下面添加以下行 [mysqld] 部分:
nano /etc/mysql/mariadb.conf.d/50-server.cnf
内 [mysqld] 部分请补充:
innodb_file_per_table=1 lower_case_table_names=0
然后,重新启动 MariaDB 以使更改生效:
sudo systemctl restart mariadb
步骤 5. 为 LibreNMS 配置 Nginx。
让我们为 LibreNMS 使用的 Nginx 创建 VirtualHost 定义:
nano /etc/nginx/conf.d/librenms.conf
将以下内容添加到配置文件中:
server { listen 80; server_name librenms.idroot.us; root /opt/librenms/html; index index.php; charset utf-8; gzip on; gzip_types text/css application/javascript text/javascript application/x-javascript image/svg+xml text/plain text/xsd text/xsl text/xml image/x-icon; location / { try_files $uri $uri/ /index.php?$query_string; } location /api/v0 { try_files $uri $uri/ /api_v0.php?$query_string; } location ~ .php { include fastcgi.conf; fastcgi_split_path_info ^(.+.php)(/.+)$; fastcgi_pass unix:/var/run/php/php7.4-fpm.sock; } location ~ /.ht { deny all; } }
现在,我们可以重新启动 Nginx Web 服务器,以便进行更改:
sudo systemctl restart nginx
步骤 6. 配置防火墙。
允许 Nginx 通过防火墙,以便用户能够从外部机器访问 LibreNMS 门户:
ufw allow 80/tcp ufw allow 443/tcp ufw reload
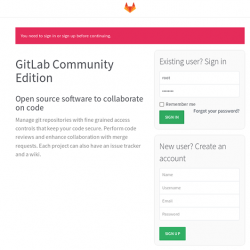
步骤 7. 访问 LibreNMS Web 界面。
默认情况下,LibreNMS 将在 HTTP 端口 80 上可用。 打开您喜欢的浏览器并导航到 https://your-domain.com/ 或者 https://server-ip-address/ 并完成所需的步骤以完成安装。
恭喜! 您已成功安装 LibreNMS。 感谢您使用本教程在您的 Ubuntu 20.04 LTS Focal Fossa 系统上安装 LibreNMS。 如需其他帮助或有用信息,我们建议您查看 LibreNMS 官方网站.