在本教程中,我们将向您展示如何在 CentOS 7 上安装和配置 Seafile。对于那些不知道的人,Seafile 是一个开源的云存储软件。 它为个人用户和组提供文件共享和同步,它提供客户端加密和从移动设备轻松访问。 还可以轻松与本地服务(如 LDAP 和 WebDAV)集成,或者可以使用高级网络服务和数据库(如 MySQL、SQLite、PostgreSQL、Memcached、Nginx 或 Apache 网络服务器。
本文假设您至少具备 Linux 的基本知识,知道如何使用 shell,最重要的是,您将网站托管在自己的 VPS 上。 安装非常简单,假设您在 root 帐户下运行,如果不是,您可能需要添加 ‘sudo‘ 到命令以获取 root 权限。 我将向您展示 Seafile Secure 的分步安装 Cloud CentOS 7 服务器上的存储。
先决条件
- 运行以下操作系统之一的服务器:CentOS 7。
- 建议您使用全新的操作系统安装来防止任何潜在问题。
- 对服务器的 SSH 访问(或者如果您在桌面上,则只需打开终端)。
- 一种
non-root sudo user或访问root user. 我们建议充当non-root sudo user,但是,如果您在充当 root 时不小心,可能会损害您的系统。
在 CentOS 7 上安装 Seafile
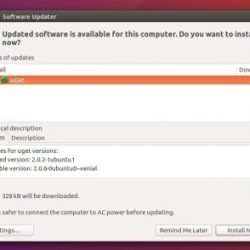
第 1 步。首先,让我们首先确保您的系统是最新的。
yum clean all yum -y update
步骤 2. 安装所需的软件包。
Seafile 存储设置需要一些 Python 模块,这些模块必须安装在您的服务器上:
yum install python-imaging MySQL-python python-memcached python-ldap python-urllib3
步骤 3. 安装 MariaDB。
使用 Yum 安装 MariaDB:
yum install epel-release yum install mariadb mariadb-server
启动 MariaDB 并使其在服务器启动时启动:
systemctl start mariadb.service systemctl enable mariadb.service
为 Seafile 配置 MariaDB。
默认情况下,MariaDB 未加固。 您可以使用 mysql_secure_installation 脚本。 您应该仔细阅读下面的每个步骤,这些步骤将设置 root 密码、删除匿名用户、禁止远程 root 登录、删除测试数据库和访问安全 MariaDB:
mysql_secure_installation
像这样配置它:
- Set root password? [Y/n] y - Remove anonymous users? [Y/n] y - Disallow root login remotely? [Y/n] y - Remove test database and access to it? [Y/n] y - Reload privilege tables now? [Y/n] y
步骤 4. 安装 Seafile。
首先到 Seafile 的下载页面下载 Seafile 的最新稳定版,在写这篇文章的时候是 6.0.8 版本:
wget https://bintray.com/artifact/download/seafile-org/seafile/seafile-server_6.0.8_x86-64.tar.gz
将 Seafile 存档解压缩到服务器上的文档根目录:
sudo mkdir -p /opt/seafile/installed sudo mv seafile-server_6.0.8_x86-64.tar.gz /opt/seafile/installed sudo mv seafile-server-6.0.8/ /opt/seafile
运行此脚本,该脚本将为 Seafile 服务器创建所需的数据库和目录,并在脚本验证所有 Python 所需模块的存在后,使用以下配置选项回答所有问题:
cd /opt/seafile/seafile-server-6.0.8 sudo ./setup-seafile-mysql.sh
安装完成后,运行以下命令启动 Seafile 服务器并设置 admin 用户帐号:
sudo ./seafile.sh start sudo ./seahub.sh start
步骤 5. 为 Seafile 配置防火墙规则。
您需要使用以下命令修改防火墙规则:
sudo firewall-cmd --zone=public --permanent --add-port=8082/tcp sudo firewall-cmd --zone=public --permanent --add-port=8000/tcp sudo firewall-cmd --reload
步骤 6. 访问 Seafile。
Seafile 默认在 HTTP 端口 8000 上可用。 打开您喜欢的浏览器并导航到 https://your-domain.com:8000 或者 https://server-ip:8000. Enter 这 admin 您在安装时创建的用于登录的电子邮件 ID 和密码。 如果您使用防火墙,请打开端口 8000 以启用对控制面板的访问。
恭喜! 您已成功安装 Seafile。 感谢您使用本教程安装 Seafile Secure Cloud CentOS 7 系统上的存储。 如需其他帮助或有用信息,我们建议您查看 Seafile 官方网站.